Deploying Application on Akash Network is quite straightforward and easy. We will try to demonstrate how to deploy any simple application on a ready and installed Akash Network.
For this demonstration/preview we will be using Akash Testnet with the following assumption:
- We will install Akash Suite version 0.9.0-rc13.
- We are using CentOS 8 Non-GUI.
- We have the Yaml file ready.
- Let’s try deploying Retwis, a Twitter-toy clone written in PHP and Redis, used in the early days to introduce Redis data types.
- We using user named bwl and already in CentOS Wheel Group.
Without further ado, let’s start with the simple step:
Choosing Network
First things about deployment in Akash, You need to select the network You want to deploy. On this example, we will be using edgenet (playgroud for having fun and try experiment for next version of Akash).
You need to set several global variable to be convenient in testnet, and to make it persistence in CentOS 8, put into:
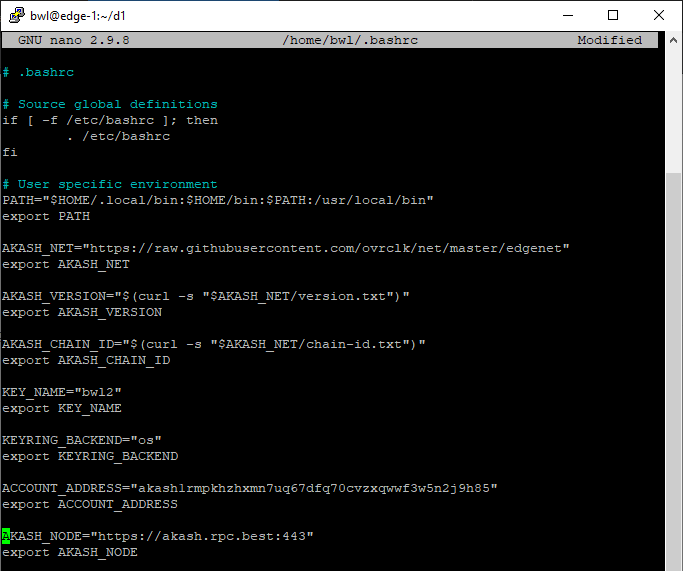
nano ~/.bashrc
to make it permanent and global for the current user. Please put the variable
#User specific environment
PATH="$HOME/.local/bin:$HOME/bin:$PATH:/usr/local/bin"
export PATH

AKASH_NET="https://raw.githubusercontent.com/ovrclk/net/master/edgenet"
export AKASH_NET

AKASH_VERSION="$(curl -s "$AKASH_NET/version.txt")"
export AKASH_VERSION

AKASH_CHAIN_ID="$(curl -s "$AKASH_NET/chain-id.txt")"
export AKASH_CHAIN_ID

KEY_NAME="bwl2"
export KEY_NAME

KEYRING_BACKEND="os"
export KEYRING_BACKEND

ACCOUNT_ADDRESS="akash1rmpkhzhxmn7uq67dfq70cvzxqwwf3w5n2j9h85"
export ACCOUNT_ADDRESS

AKASH_NODE="https://akash.rpc.best:443"
export AKASH_NODE
after adding it like this:
Save and exit. then execute:
source ~/.bashrc
To update and reflect changes to our system and ready to use.
Install Akash Suite
wget https://github.com/ovrclk/akash/releases/download/v0.9.0-rc13/akash_0.9.0-rc13_linux_amd64.rpm

rpm -i akash_0.9.0-rc13_linux_amd64.rpm
We are using version 0.9.0-rc13 and ready to use.
Wallet Setup
We need to pay the provider using uATK (micro AKT). Easy to remember that 1 AKT = 1000000 uAKT. So we need to ready the wallet
akash \
--keyring-backend "$KEYRING_BACKEND" \
keys add "$KEY_NAME"
that will product the wallet including the mnemonics. Please save the 24 word mnemonic to recover the wallet when it’s deleted or going trouble.
to make next process easy, put the wallet into a global variable. Using the same method like nano ~/.bashrc and source ~/.bashrc above and You can change it with Your own wallet:
ACCOUNT_ADDRESS="akash1rmpkhzhxmn7uq67dfq70cvzxqwwf3w5n2j9h85"
export ACCOUNT_ADDRESS
and as in playground like edgenet-1, You can refill the wallet using faucet to play with.
Detect where the faucet using:
curl "$AKASH_NET/faucet-url.txt"
Response:
https://akash.vitwit.com/faucet
And You can always find Your wallet address using:
akash \ --keyring-backend "$KEYRING_BACKEND" \ keys show "$KEY_NAME" -a
To check balance:
akash \ --node "$AKASH_NODE" \ query bank balances "$ACCOUNT_ADDRESS"
Deploy Application
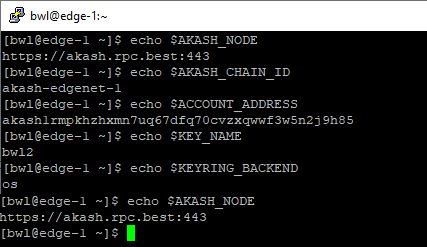
Before deployment, we can check if all the settings are ok by using echo.
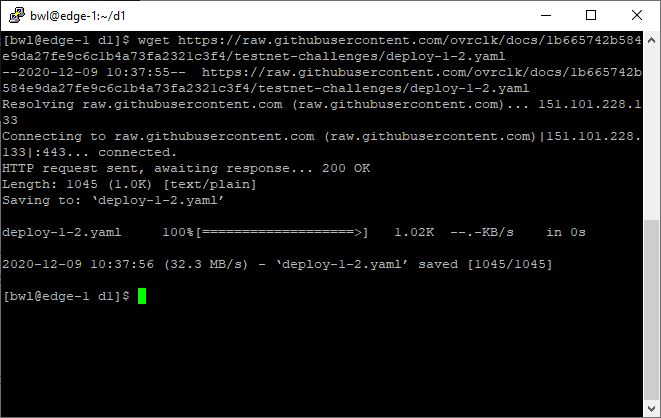
and put the yaml on the folders:
wget https://raw.githubusercontent.com/ovrclk/docs/1b665742b584e9da27fe9c6c1b4a73fa2321c3f4/testnet-challenges/deploy-1-2.yaml
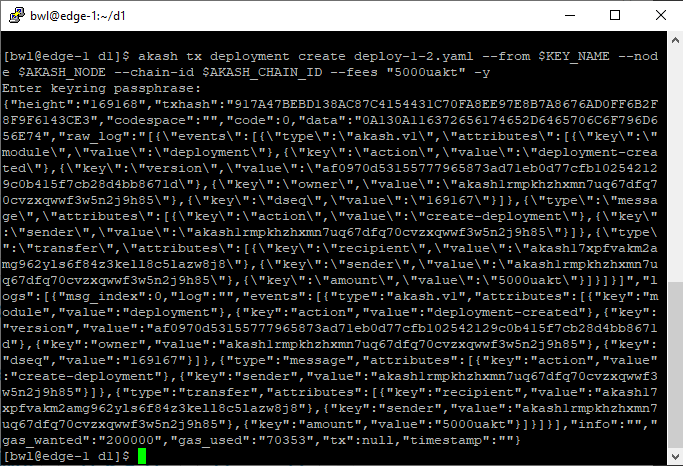
then let’s deploy:
akash tx deployment create deploy-1-2.yaml --from $KEY_NAME --node $AKASH_NODE --chain-id $AKASH_CHAIN_ID --fees "5000uakt" -y
and take the lease we get from the provider
akash query market lease list --owner $ACCOUNT_ADDRESS --node $AKASH_NODE --state active
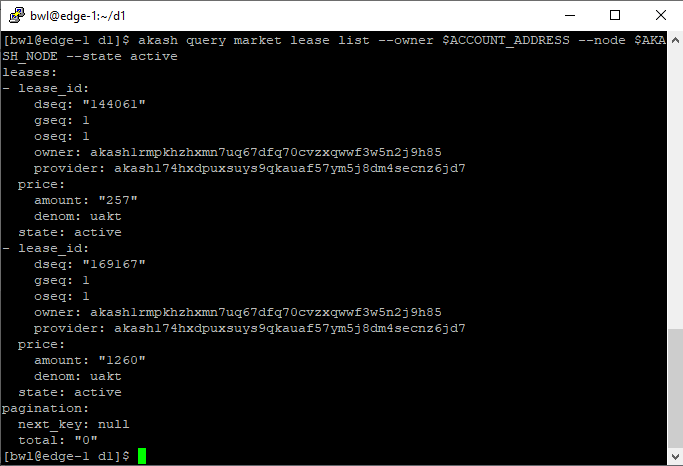
Please note that our newest lease, in Akash we called it $DSEQ is 169167. In my VM, there are another deployment which is 144061.
To be precise, our deployment is:
- lease_id:
dseq: "169167"
gseq: 1
oseq: 1
owner: akash1rmpkhzhxmn7uq67dfq70cvzxqwwf3w5n2j9h85
provider: akash174hxdpuxsuys9qkauaf57ym5j8dm4secnz6jd7
price:
amount: "1260"
denom: uakt
state: active
pagination:
next_key: null
total: "0"
and we can export all the 4 variable here to proceed with the manifest. See the picture as we can use any method or style
[bwl@edge-1 d1]$ export PROVIDER="akash174hxdpuxsuys9qkauaf57ym5j8dm4secnz6jd7"
[bwl@edge-1 d1]$ export DSEQ="169167"
[bwl@edge-1 d1]$ export GSEG=1
[bwl@edge-1 d1]$ export OSEQ=1
[bwl@edge-1 d1]$ echo $PROVIDER $DSEQ $OSEQ $GSEQ

Time to execute and enjoy:
akash provider send-manifest deploy-1-2.yaml --node $AKASH_NODE -dseq $DSEQ --oseq $OSEQ --gseq $GSEQ --owner $ACCOUNT_ADDRESS --provider $PROVIDER
and detect the URL
akash provider lease-status --node $AKASH_NODE --dseq $DSEQ --ose $OSEQ --gseq $GSEQ --provider $PROVIDER --owner $ACCOUNT_ADDRESS
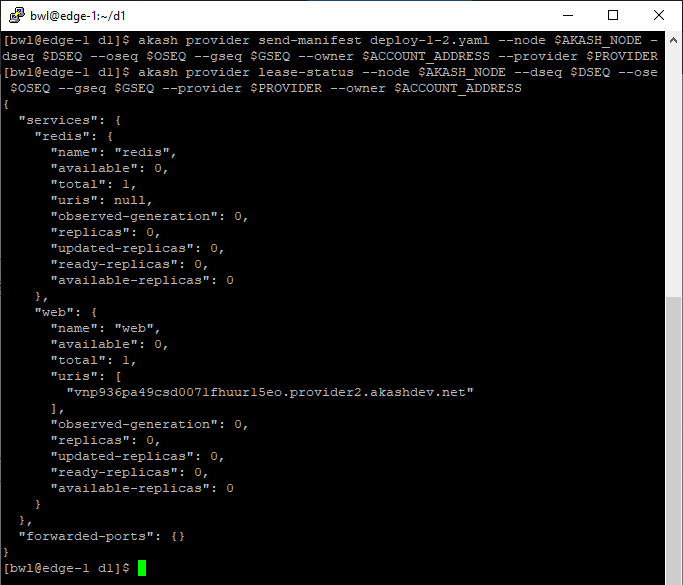
we can see the above URL:
http://vnp936pa49csd0071fhuur15eo.provider2.akashdev.net
and our Application is ready:

That’s it, let’s have fun when Akashnet ready for production grade in 2021. Of course all steps will be easier as our team will create some GUI and also easier script for deployment.
For more information and detailed documentation, please visit:
https://docs.akash.network/v/master/guides/deploy
Thank You and have fun.